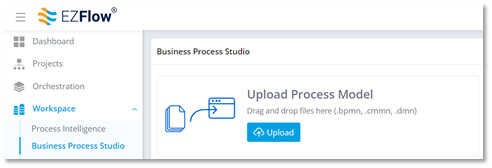
To open the Business Process Studio module, click the Workspace drop-down from the left toolbar, and then click Business Process Studio.
The BPS is where we make our process better, redesigning segments, designing new ones and assigning and executing automations. You can also see how your automations will play out using visualizations and modeling tools before sending your automations live. The BPS is where we shape our business processes to perform at their best.
Once you’ve designed your process, the BPS gets to work, kickstarting your assigned automations, helping you automate and standardize business processes.
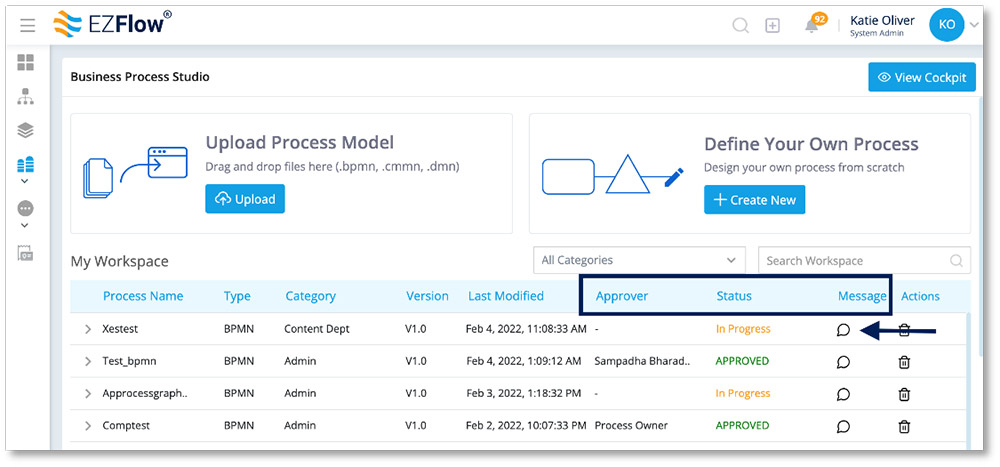
When you open the module, you’ll see two options, one for uploading your data, the other for defining your own process:
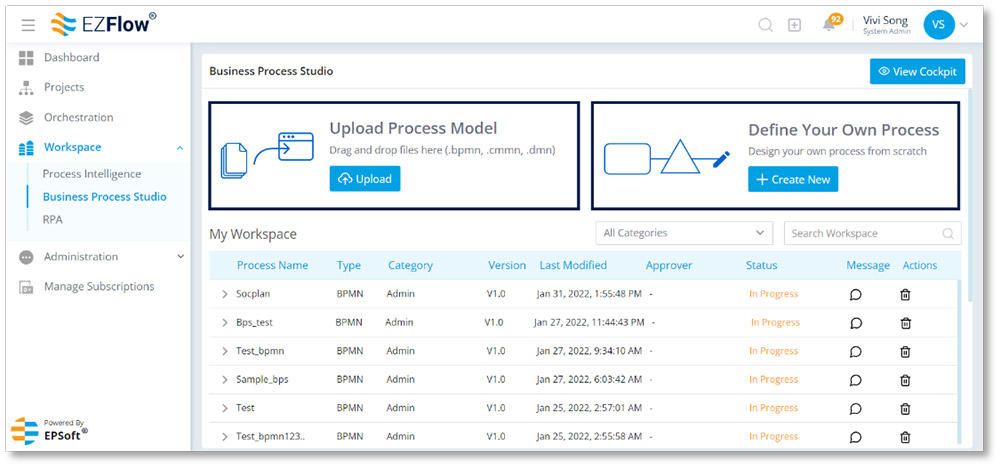
| Upload a Process Model: This option allows you to upload your own. BPMN, .CMMN and .DMN files to EZFlow | Define Your Own Process: This option allows you to design your own process from scratch, right within the platform |
You’ll also see all your current process models in a grid within your BPS workspace. This view displays the status of each project. If your process is approved, it will show APPROVED in status. If it’s not approved, it will show the current status. If your process requires actions prior to approval, your approver can also provide notes, which will indicated as messages on this screen.
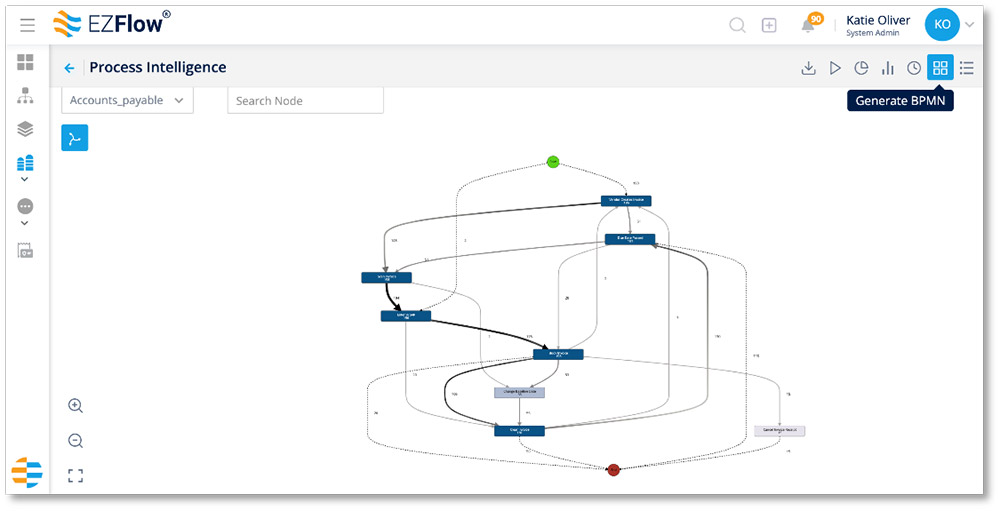
You can also choose to start in the Process Intelligence module, which generates a BPMN of your as-is process for you using your systems’ data. Once EZFlow creates your BPMN within Process Intelligence, EZFlow automatically pulls it into the BPS for you to manage. If you skip this step, you can also upload your own process model, or create one from scratch.
Uploading a New Process Model
- Click upload
- Locate your file and upload it to EZFlow
- Fill in the form fields and click Proceed
- The next screen should display a visual graph of your BPMN
Once your BPMN is uploaded, you can make changes by clicking the edit icon on the top toolbar. The BPS canvas and tools vary based on the type selected. This is what it looks like for BPMN type, but the canvas appears different for DMN and CMMN types.
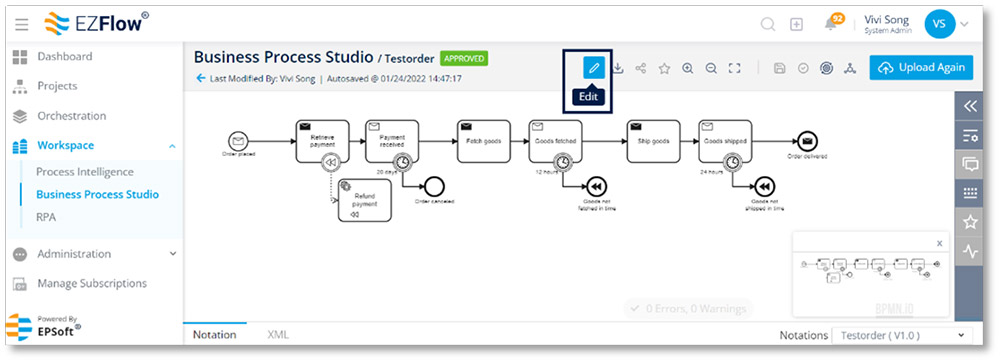
This will reveal an additional toolbar on the left, which you can use to edit your BPMN within EZFlow.

At any point, you can save your work by clicking the disk icon in the top toolbar.

You can also download , share and save your favorite designs by using the other icons on the top toolbar.
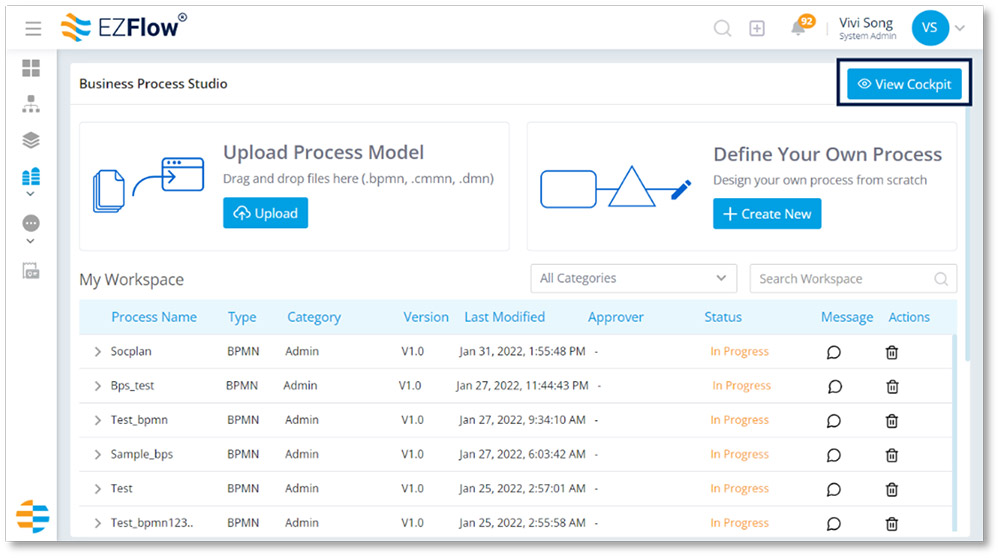
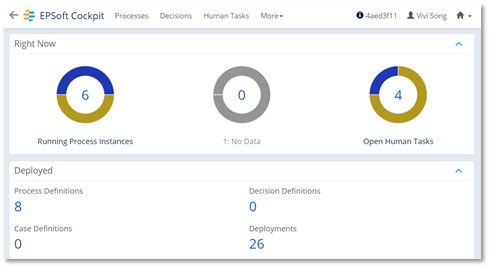
From the main workspace of the Business Process Studio, you can get a high-level view of all your processes by clicking View Cockpit in the upper right corner.
The cockpit provides a snapshot of all your running processes. After clicking Cockpit, you’ll see the Applications window. Click Cockpit once more and you’ll see your overview stats.
To return to the Business Process Studio, click the back arrow in the upper left.
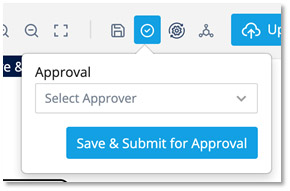
Once you’ve made your final changes, click the checkmark icon, select your Approver, then click Save & Submit for Approval.
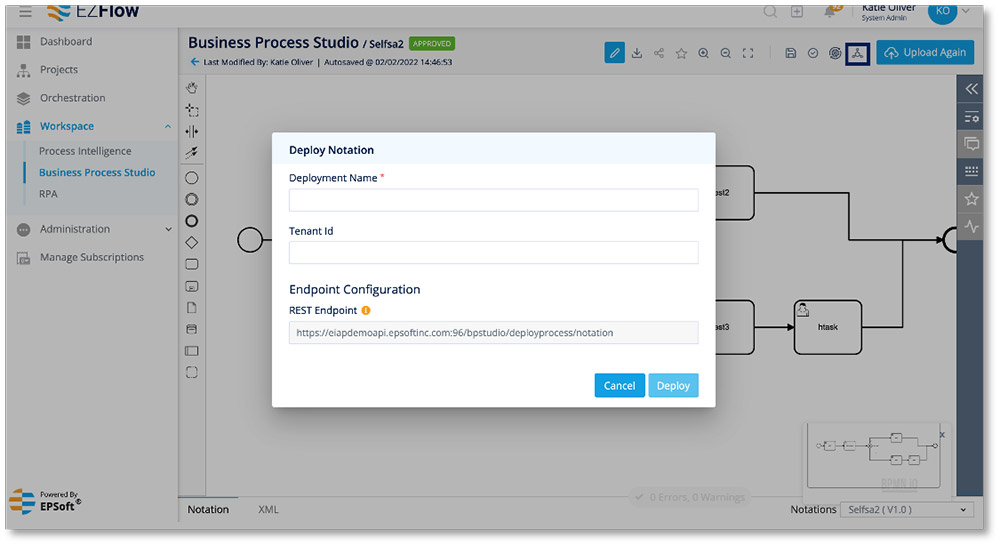
Once approved, your BPMN will show Approved in the Status column on the BPS home screen. When you view your approved BPMN, you’ll also now have an extended top tool bar with new icons for Orchestration and Deploy Notation.

Next, deploy your notation into production. Once you do, you can view it in the Cockpit.
Creating a New Process Model
- From your main BPS workspace, click the +Create New button on Define Your Own Process
- Select your notation and process owner and enter your process name, then click Proceed
- Select tools from the toolbar to the left of the canvas to map out your process model
- Once you’ve made your final changes, click the checkmark icon, select your Approver, then click Save & Submit for Approval
Comparing As-Is and To-Be Processes
- From your BPS workspace, download your new process and save it to an easily accessible location
- Click Workspace, then Process Intelligence in the main navigation
- Locate the process graph you want to compare your new process to and open it by clicking the view icon
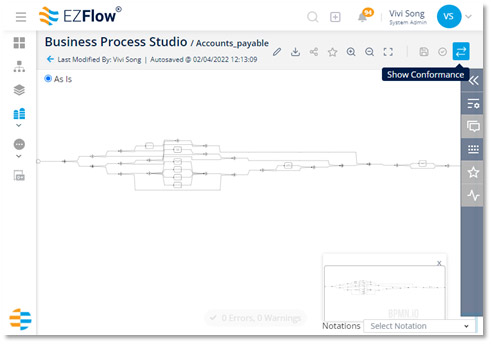
- Click the box grid icon to generate the BPMN
- Click the arrow icon to Show Conformance

- Click Upload on the Upload Process Model option
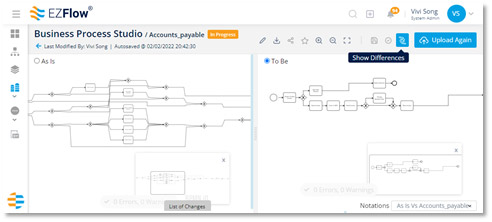
- Locate your new process and upload. EZFlow will then display both processes side by side, labeled As Is and To Be. Zoom in and out using a pinch gesture or the toolbar icons.
- Click Show Differences (located next to Upload Again)
- EZFlow will highlight the difference between your As Is and To Be versions for easy comparison. To see a list of changes, click List of Changes.