RPA allows you to automate repetitive tasks in your business process with little to no coding. Each of the available features can be customized and tailored allowing you to create automation programs, sometimes called RPA Robots or “bots,” uniquely suited to your needs.
Attended bots are for processes that require a person’s involvement. This typically means the process involves some form of decision-based work. For example, an attended bot might be designed to automatically retrieve a file from one system while a customer service rep fields calls and works in another system.
Unattended bots, on the other hand, are bots that work without human intervention. They are typically deployed for task-heavy operations. These often include back-office activities and involve high volumes of batched data entry with retrieval to and from various applications.
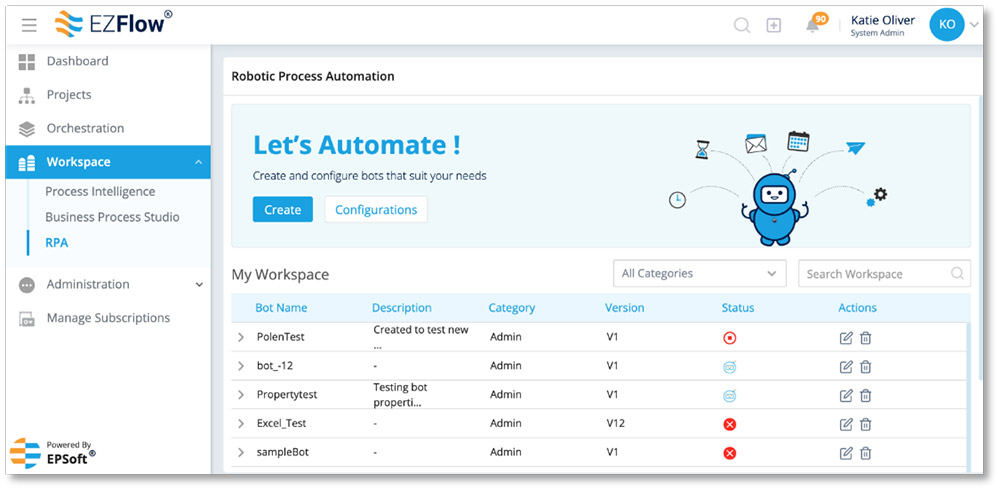
To begin the RPA process, first click on the Workspace icon. Then click RPA in the drop-down list.
Configuring Automations
To begin automation, you must first configure the environment where the bot is needed. The Configurations tab helps you manage database connections and email addresses. It also notifies you when a bot is created and deployed or executed.
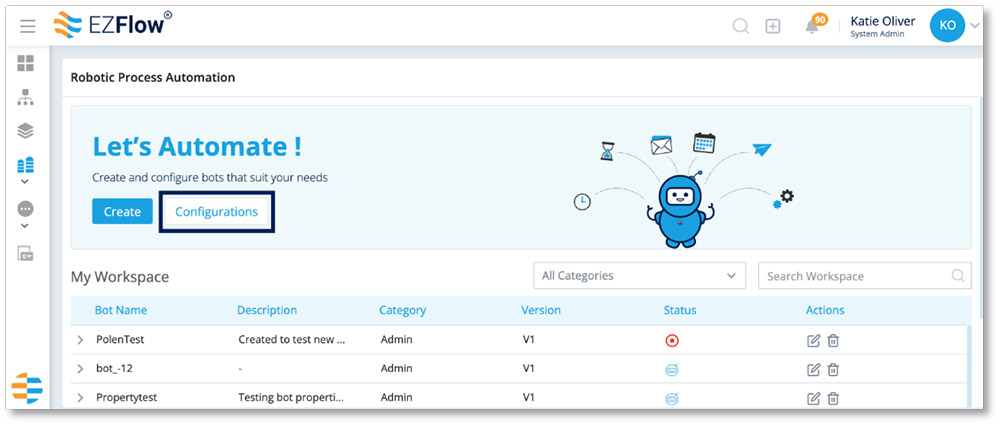
The Configuration screen allows you to select from the following components:
- Environments
- Database Connections
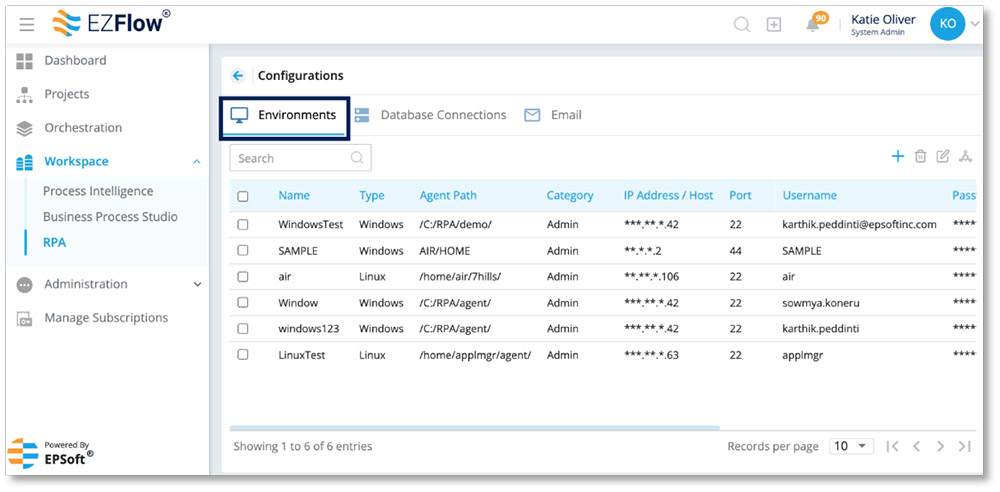
Environments
Click the Environments tab to configure the environments in which the bot can be created and used.
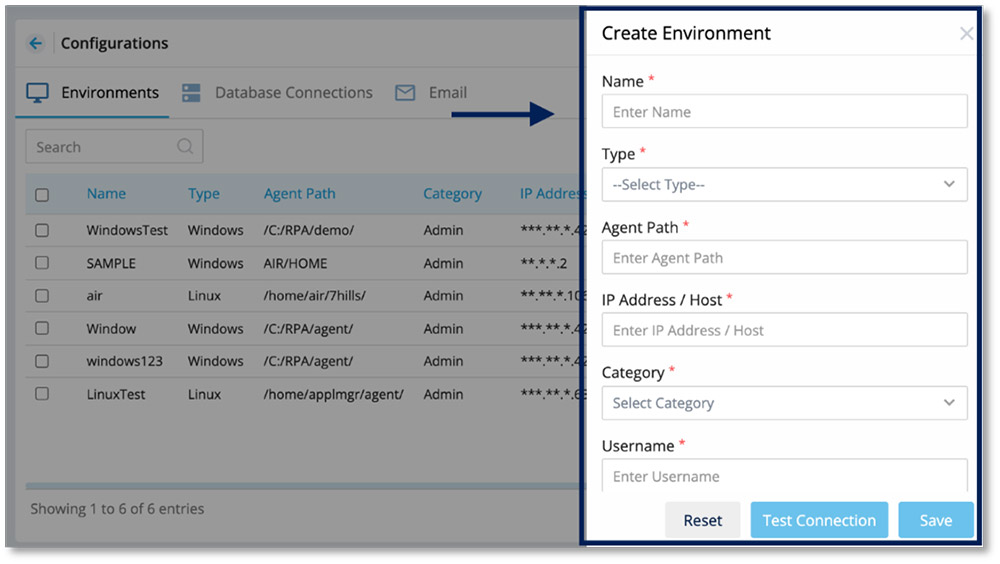
Creating a New Environment
- Click the create icon in the upper right corner
- Enter the details in the required fields
- Reset clears all details for reentry
- Test Connections will test to see if the configurations are valid or invalid
- Save preserves the information to create the newly configured environment

- After you successfully create an environment, you will receive confirmation
Deleting an Environment
- Open the Environments view
- Locate the environment(s) you want to delete
- Select your environment(s) by clicking the checkbox on far-left column
- Click the delete icon in the upper right corner

- Confirm that you would like to delete the environment
- After you successfully delete, you will receive confirmation
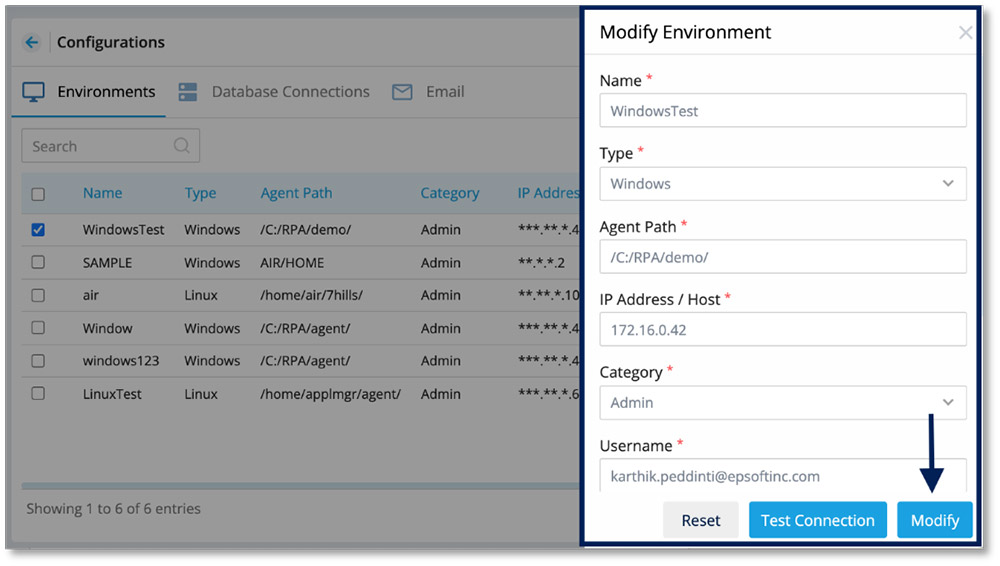
Modifying an Environment
- Open the Environments view
- Locate the environment(s) you want to modify
- Select your environment(s) by clicking the checkbox on far-left column
- Click the edit icon in the upper right corner
- Enter the information into the required fields

- After you successfully modify, you will receive confirmation
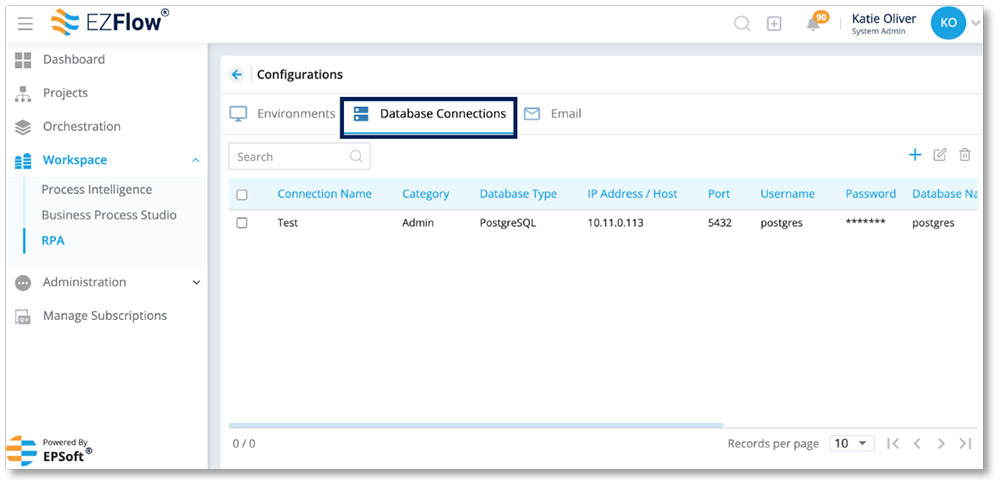
Database Connections
By clicking this tab, you can search for a particular database, create a new connection, modify an existing connection, or delete a database connection.
The Database Connections tab displays all the databases connected to the RPA module. The table displays Database Name, IP Address/Host, Port Schema, and more.
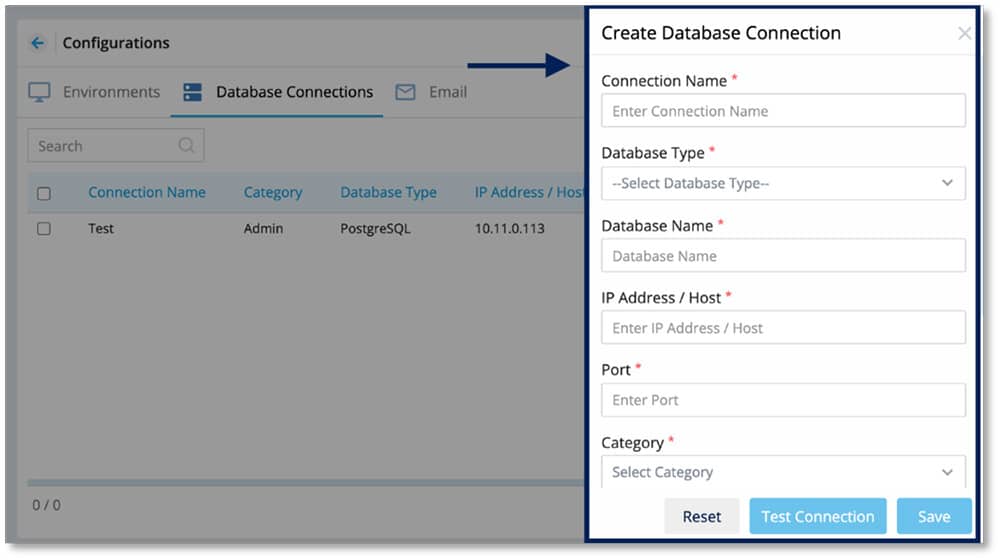
Configuring a Database Connection
- Click the create icon
- Enter the required information in the correct fields

- After you successfully create a new database, you will receive confirmation
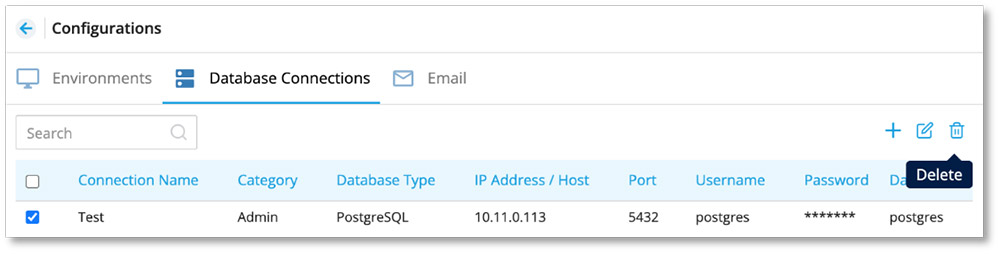
Deleting a Database Connection
- Open the Database Connections view
- Locate the database connection(s) you want to delete
- Select your database connection(s) by clicking the checkbox on far-left column
- Click the delete icon
- Confirm that you would like to delete the database connection
- After you successfully delete, you will receive confirmation

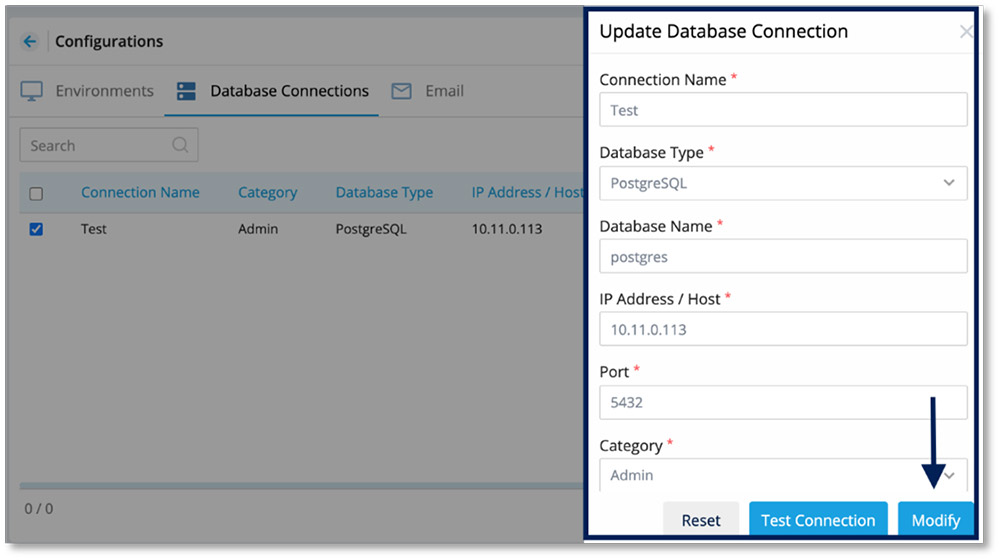
Modifying a Database Connection
- Open the Database Connections view
- Click the edit icon
- Fill in the required fields with the correct information
- Click Modify to save your changes
- After you successfully modify your database connection, you will receive confirmation
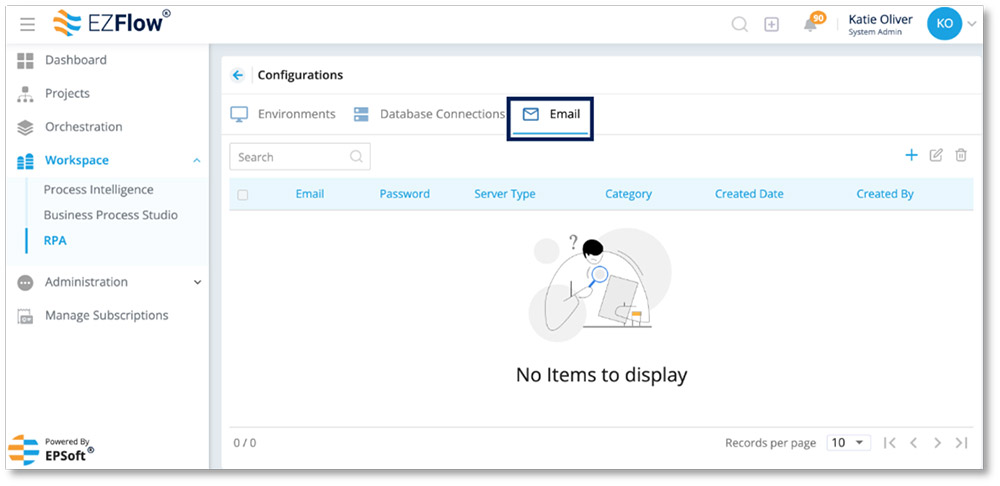
The Email tab displays all your configured emails regarding bot execution status. The table displays Email, Password, and Server Type as well as creation date and author information.
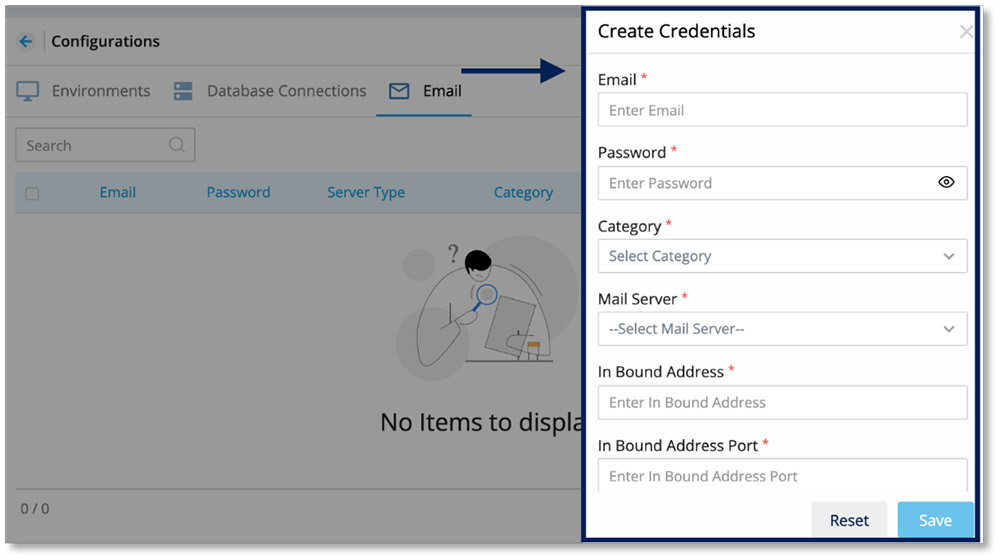
Adding Email Credentials
- Click the create icon in the upper right corner
- Enter the correct information into the required fields
- After you successfully create a new email, you will receive confirmation
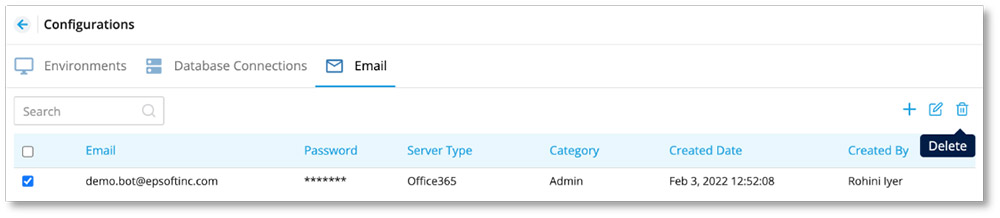
Deleting Email Credentials
- Open the Email view
- Locate the email you want to delete
- Select the email by clicking the checkbox on far-left column

- Click the delete icon
- Confirm that you would like to delete the email
- After you successfully delete, you will receive confirmation
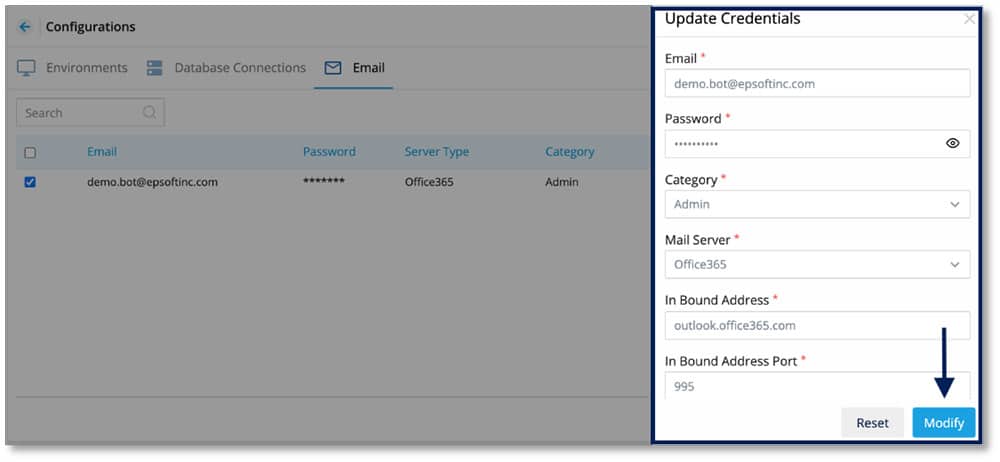
Modifying Email Credentials
- Open the Email view
- Locate the email you want to modify
- Select the email by clicking the checkbox on far-left column
- Click the edit icon
- Enter the correct details into the required fields and click Modify to save your changes

- After you successfully modify an email, you will receive confirmation
Creating Bots
Now that you have configured the environments, databases, and emails, you can begin the process of creating bots.
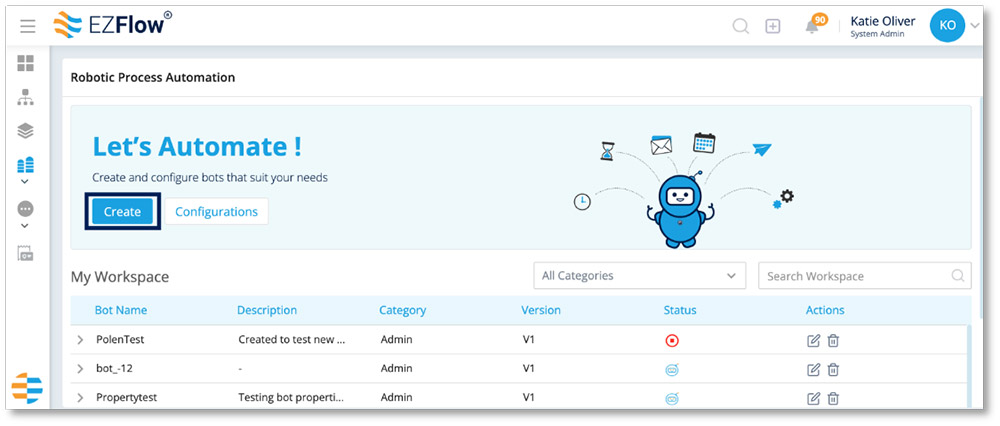
- Click the Create button
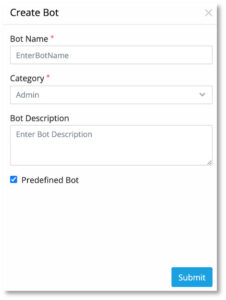
- Enter the bot details into the required fields and click Submit
 Tip: Check Predefined Bot to store a bot for future duplication. Create bots again without having to start from scratch!
 Tip: Check Predefined Bot to store a bot for future duplication. Create bots again without having to start from scratch!
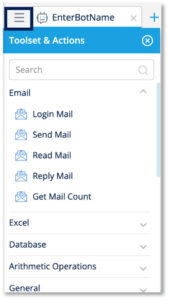
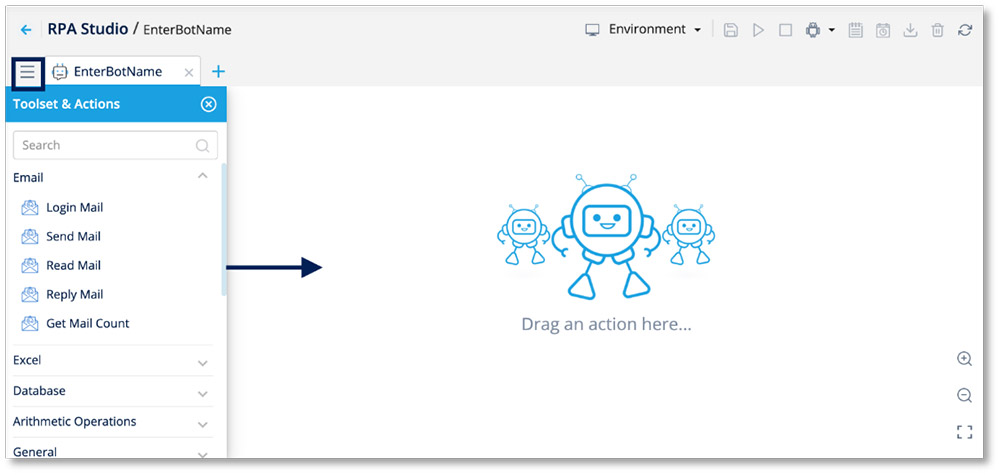
- After clicking Submit you will see the canvas which is where you can configure the bot’s actions
- Click the three stacked lines to reveal the Toolset & Actions menu

- Click on the actions within the Toolset to see each option’s sub-menu
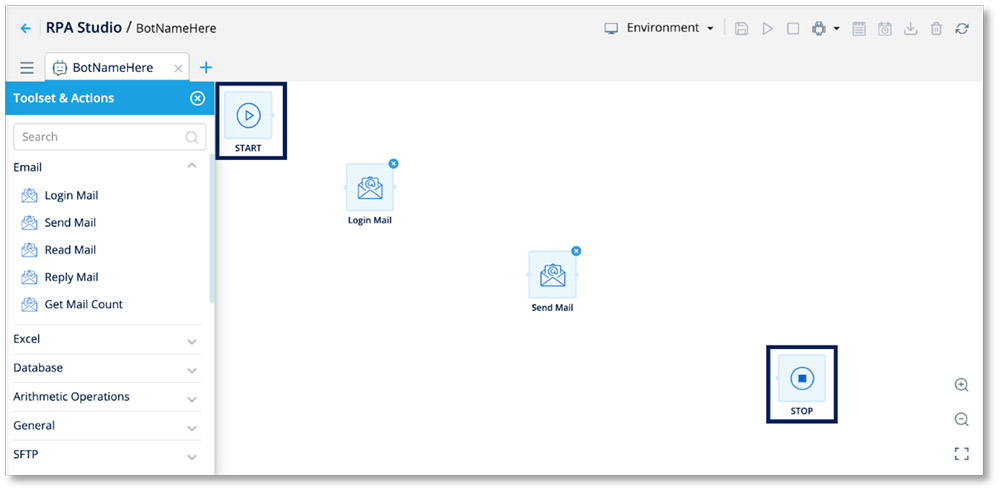
- Drag and drop the tasks into the canvas to create a sequence of actions

Tip: START and STOP (first and last step) will automatically appear on the canvas for you. If you don’t see them both, zoom out. Simply drag and drop your steps between them to establish the task order.

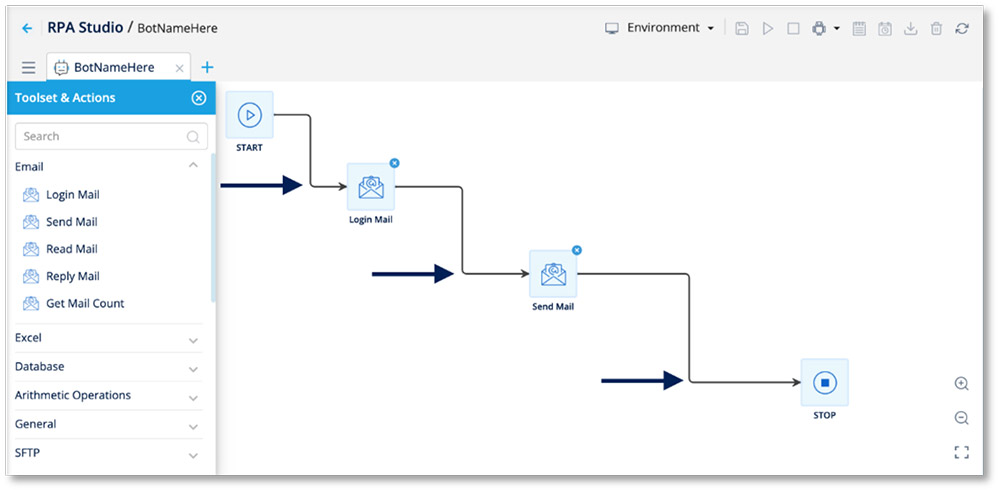
- Connect the task boxes to show the workflow
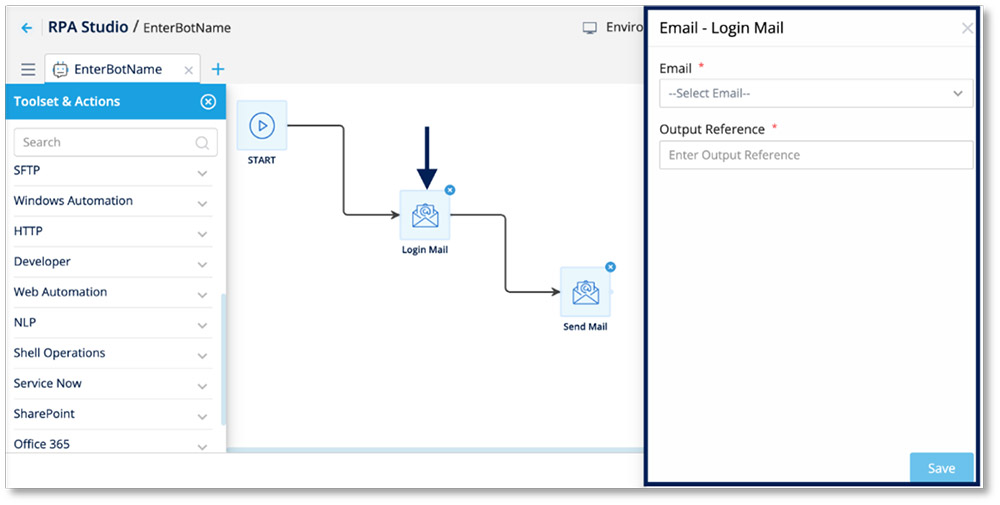
- Double-click the first box to configure the action

- Enter the details to configure the box and click Save.
- Repeat the previous 2 steps for all the tasks in your workflow
- Click the save icon. Your bot is ready for action!
Executing Bots
With your bot created, you have a few options for what comes next.
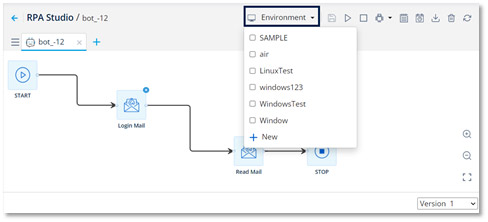
- Change Environment: You can change the environment or select multiple environments by clicking the down-arrow to reveal the environments list.

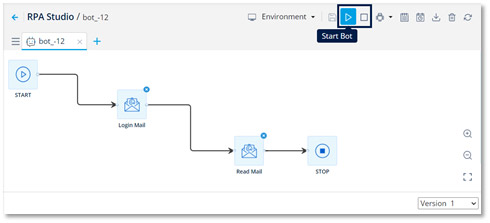
- Start/Stop: You can set your bot in motion immediately by using the Start and Stop icons.

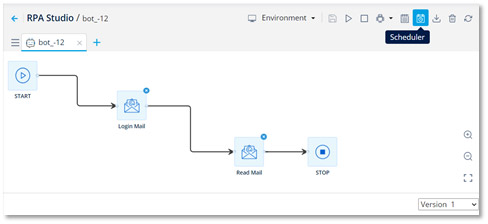
- Schedule for Later: Or, you can schedule your bot to run at a future time by clicking the calendar icon, which will reveal a scheduler form. Fill in the form and save and your changes, and your bot will run as scheduled.

- Orchestrate and Configure Your Bot: You can also manage your bot’s execution within the Service Orchestration module. See Orchestration for more details.
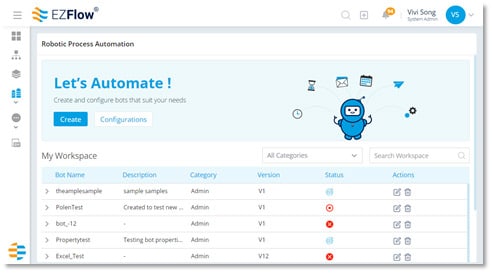
Opening a Bot
You can view and open all your bots from the main RPA workspace. To edit a created bot, simply click the view icon. To delete a created bot, click the delete icon.
Predefined Bots
Predefined bots are a simple way to save time. Some workflows may need to be repeated in different processes. Instead of beginning from scratch every time, you can build the first bot, saving it as a Predefined Bot (see Creating Bots for more details about how to do this). When you need it again to start another workflow, simply select it from the Predefined Bots icon on your top toolbar. You can add to it just like you would as if you started from scratch—drag and drop your tasks right into the canvas and proceed with your bot creation.
